
Creating a personalized storybook for your child is a fun and rewarding project that adds a unique touch to storytime. Whether you want to make a story featuring your child’s name, favorite animals, or magical characters, this guide offers step-by-step instructions to help you craft a memorable storybook with ease.

Step 1: Choose a Theme and Storyline
A clear, engaging theme makes the storybook more fun and memorable. Here are a few inspiring themes to get started:
- Everyday Adventures: Turn daily routines into magical moments. Imagine “A Magical Day at the Park” or “Bedtime Under the Stars.”
- Imaginative Journeys: Take your child on a journey to magical lands, underwater kingdoms, or distant planets.
- Animals and Nature: If your child loves animals, a safari or jungle theme could be captivating, introducing them to new creatures in a playful way.
Example Story Starter: “One day, Jamie found a sparkling key under his pillow. When he unlocked his closet, he found a path that led to a magical land of talking animals!”
Step 2: Gather Visuals (Photos or Illustrations)
Visuals are key to bringing a personalized storybook to life. Here’s how to gather images that suit your story:
- Use Photos of Family and Friends: Including family photos adds a real-life connection to the story.
- Free Stock Illustrations: Websites like Unsplash, Pixabay, or Canva offer high-quality, royalty-free images perfect for kid-friendly stories.
- Hand-Drawn Art: If you enjoy drawing or know someone who does, hand-drawn illustrations can make the book truly unique.
Step 3: Write the Story Text with Simple, Relatable Language
Writing engaging, age-appropriate text is essential. Here’s how to tailor the text for a young audience:
- Personalization: Use your child’s name and familiar names of family or friends. This brings an extra level of excitement to each page.
- Fun Dialogue: Dialogue adds energy to the story. You can create silly conversations between characters, making it interactive and fun to read aloud.
- Rhyming and Rhythm: Children love rhyme, and rhythmic sentences are easier to remember. “Zoom to the moon, let’s fly up soon!” is a catchy phrase that adds excitement to the adventure.
📜 Step 4: Add Interactive Elements
Interactive storybooks make reading more engaging. Here are some creative ways to add interactivity:
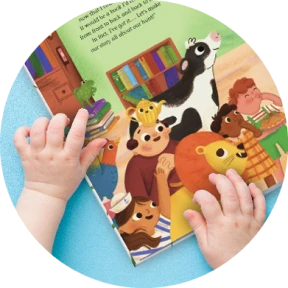
- Lift-the-Flap Pages: Hide characters, animals, or objects behind flaps for your child to discover.
- Touch-and-Feel Materials: Use materials like felt, sandpaper, or fabric to add texture. These sensory elements make the book more exciting.
- Search-and-Find Activities: Add a small “hidden item” on each page, like a star or animal, for your child to find.
📝 Step 5: Add Finishing Touches to Personalize the Storybook
Personal touches help turn a storybook into a treasured keepsake:
- Favorite Colors: Use your child’s favorite colors in the design, whether for backgrounds, borders, or text.
- Dedication Page: Write a short message on the first page, dedicating the book to your child. Example: “For Jamie, my little adventurer. May you always dream big.”
- Themed Borders and Fonts: If your story has a theme, like a safari or underwater adventure, match the fonts and colors to complement it.
Step 6: Print and Bind the Book
DIY Printing Options:
- Print at Home: Cardstock paper is a great choice as it’s durable and holds up well for little hands.
- Binder Rings: Punch holes along one edge of the pages and use rings for easy, DIY binding.
- Laminate Pages: For extra durability, consider laminating the pages. It protects the book and makes it easier to clean.
Professional Printing Services:
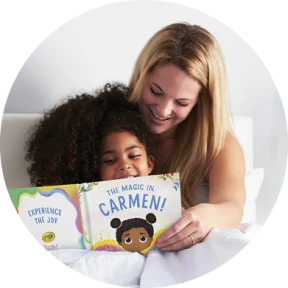
- Explore Our Customizable Storybooks: For a professional finish, explore our Personalized Storybooks. These books allow you to easily customize with your child’s name, photo, dedication, and other details for a one-of-a-kind story experience.
- Local Print Shops: Many local print shops offer affordable options for printing and binding, and you can even choose finishes like gloss or matte.
📚 Step 7: Present the Storybook as a Special Gift
Consider presenting the book in a way that makes it a memorable gift:
- Gift-Wrapped Reveal: Wrap the book with a bow and give it during a special occasion, like a birthday or family celebration.
- Family Storytime Debut: Gather the family and make the first read-through a shared experience.
- Make It Part of a Storytime Routine: Read the story together every night or once a week, creating a special bonding tradition.
Benefits of Personalized Storybooks for Child Development
Personalized storybooks are more than just fun; they offer developmental benefits that support early childhood learning:
- Enhanced Reading Engagement: Seeing their name in a story makes reading more enjoyable and meaningful, encouraging a love of books.
- Boosted Self-Esteem: Personalized elements give children a sense of importance and belonging.
- Improved Language Skills: Exposure to new words and sentence structures through stories can enhance language development.
- Encouragement of Imagination: Custom stories spark a child’s imagination, especially when the story explores new places or introduces magical elements.
Alternative Storybook-Making Methods for Non-Crafty Parents
If you’re not into DIY crafts or prefer a more convenient route, here are alternative options:
- Personalized Storybooks with Us: Explore our collection of personalized storybooks where you can easily add your child’s name, photo, dedication, and other unique details.
- Use Apps Like Canva or Book Creator: Canva offers book templates that are easy to customize. Book Creator is another app that lets you design digital storybooks with images, text, and audio.
- Create a Digital Storybook: Platforms like StoryJumper allow you to add text, images, and even record your voice reading the story.
Additional Tips and Tricks
- Ask Your Child for Input: If they’re old enough, involve them in picking characters or themes. Kids love having a say in their own stories!
- Use a Simple Template: Canva or Microsoft Word templates make creating story pages easier. Just drop in text and images without worrying about complex layouts.
- Make a Seasonal Series: Keep things fresh by creating a few storybooks each season or for holidays, like “Sam’s Snowy Day Adventure” or “Emma’s Easter Egg Hunt.”
Crafting a personalized storybook for your child is an incredibly special project that transforms storytime into a personalized experience. From selecting a theme and writing engaging text to printing and adding unique touches, each step adds value and love to the final product. A well-made personalized storybook isn’t just a story; it’s a cherished keepsake that your child will treasure for years to come.
Take your time, get creative, and enjoy the experience—this is a story your child will never forget!


